English
 简体中文
简体中文
 繁體中文
繁體中文
 Français
 Español
 عربي ،
 русский язык
 Português
 Deutsch

drawing
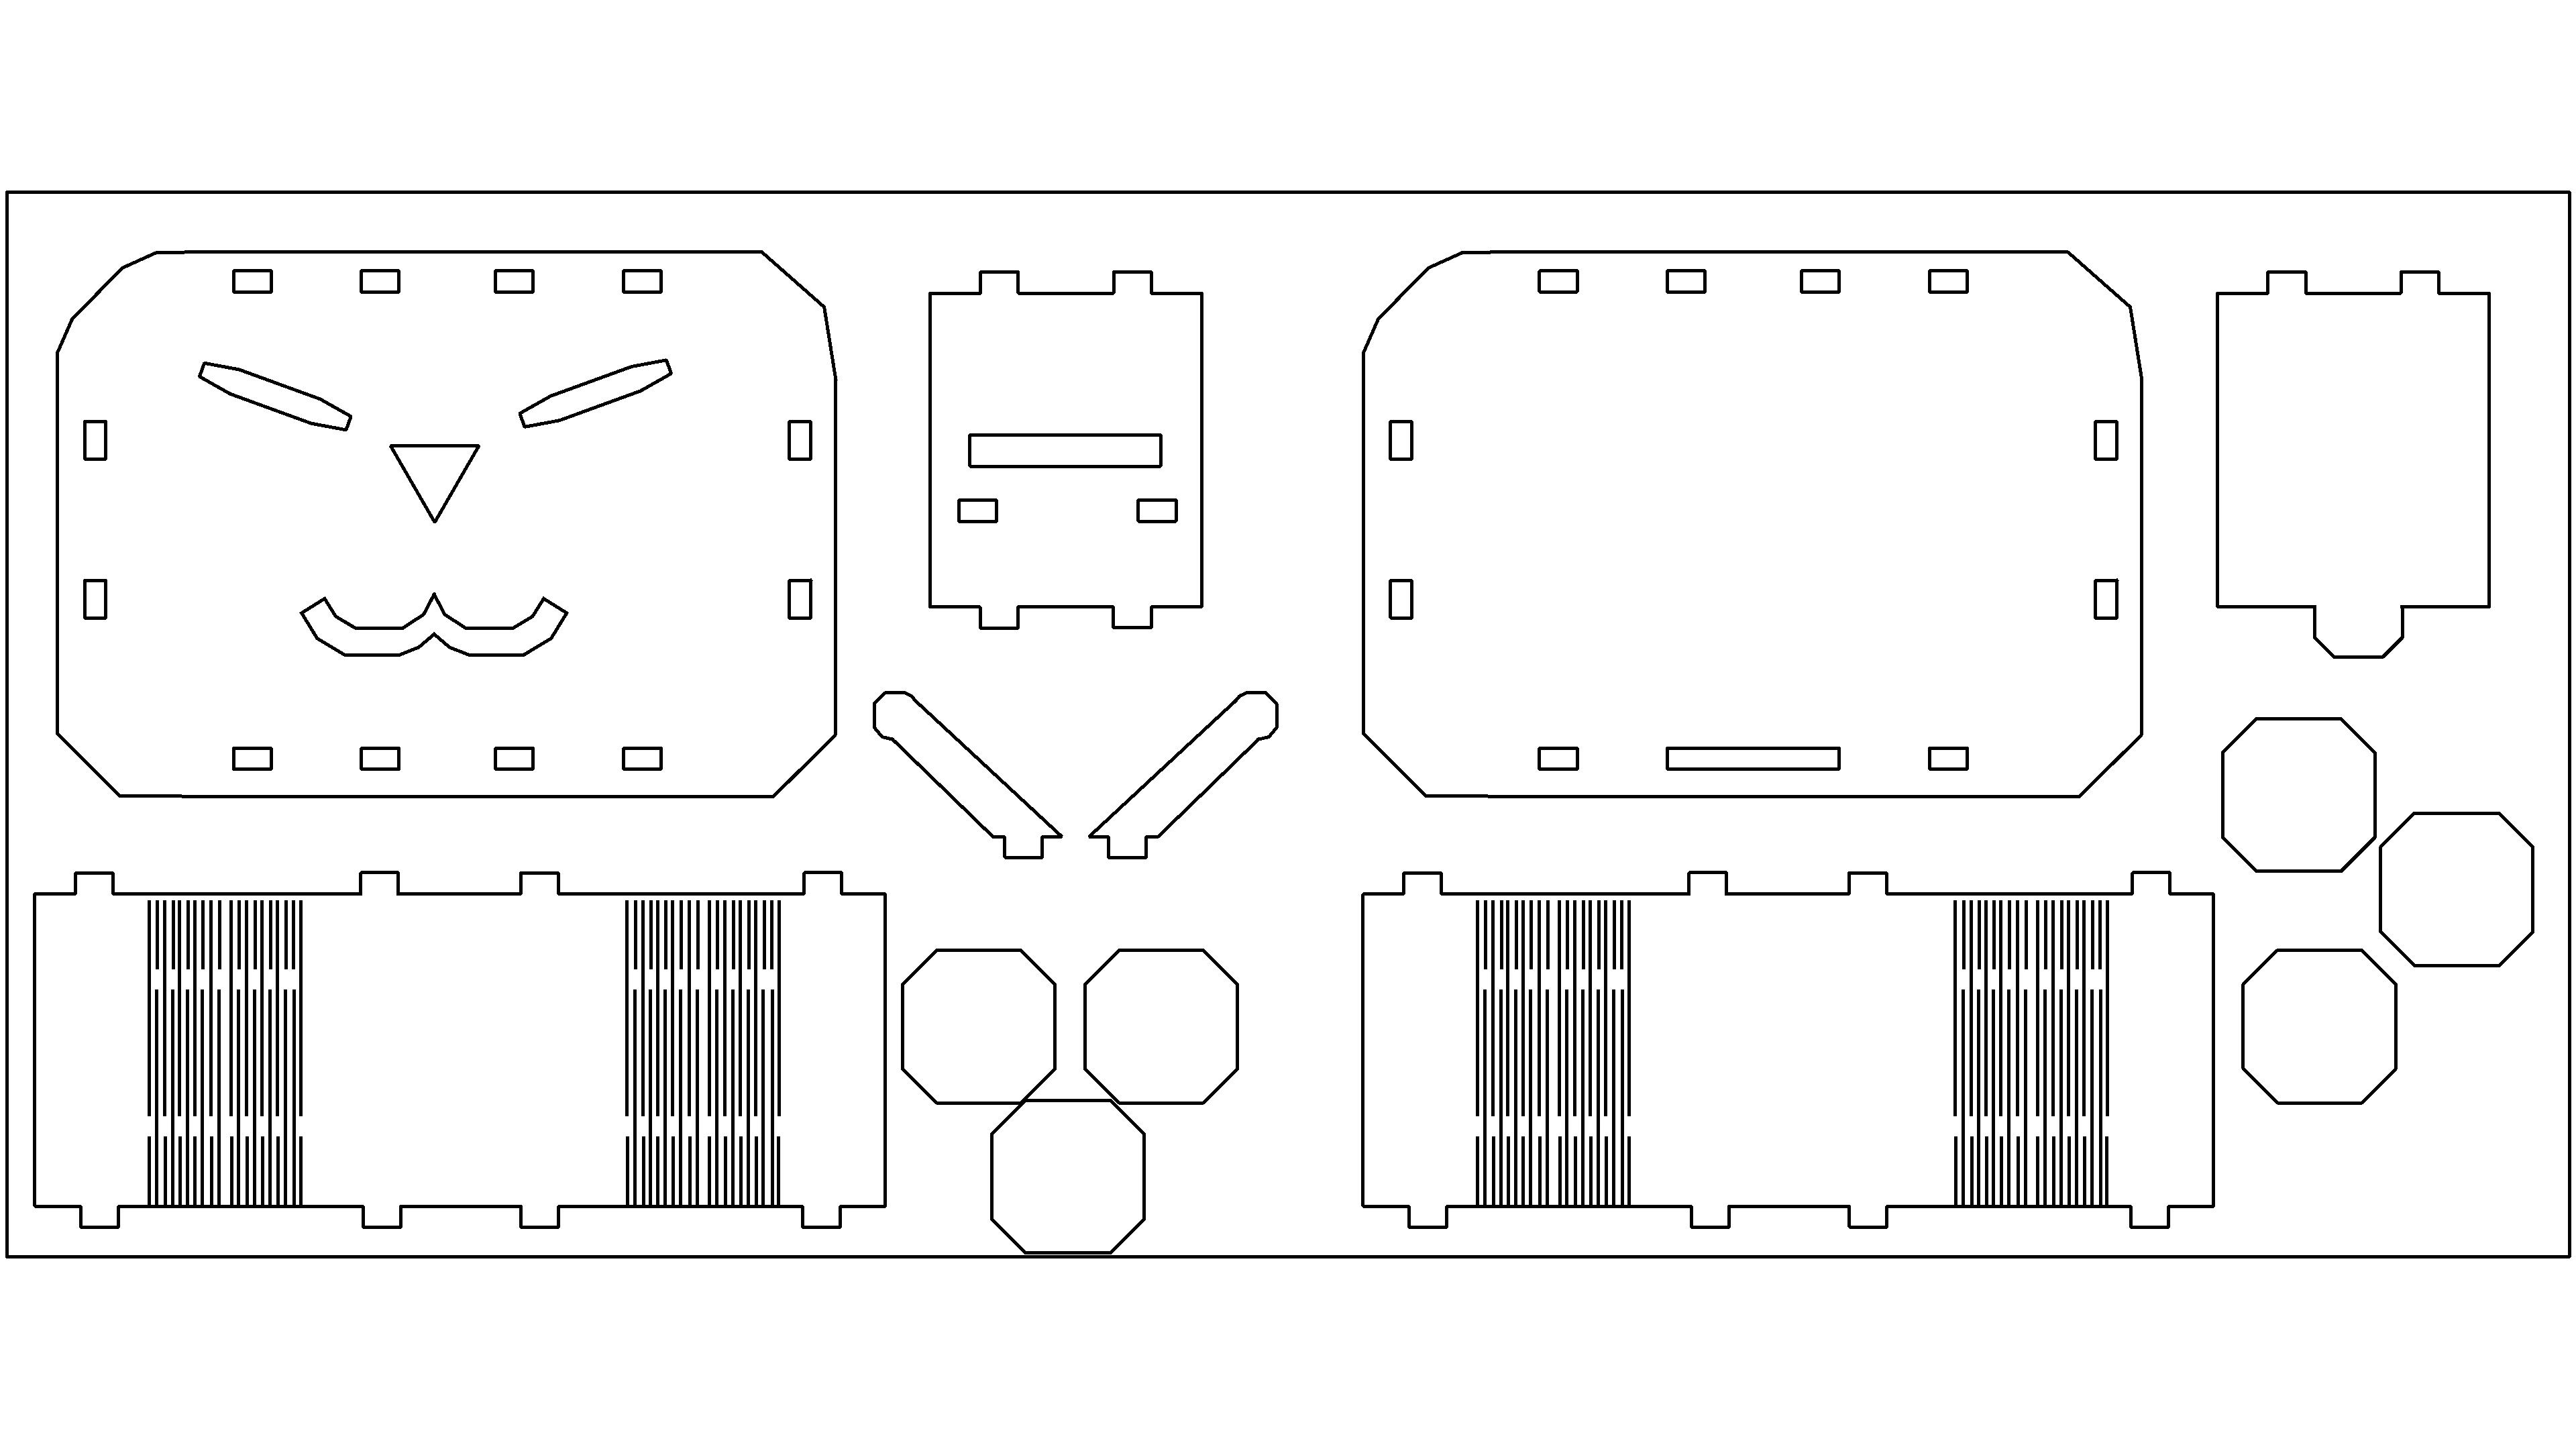
Small TV piggy bank design project


Drawing Information
Drawing video
Drawing Description
Vintage Cute and Fun Small TV Savings Bank Works Description
This work is a laser cutting cultural and creative product that combines desktop decoration and practical savings functions. The design concept originates from the classic design of old-fashioned black and white televisions, extracting iconic dual antennas and rounded square body elements, paired with soft and cute cat facial patterns, cleverly blending retro nostalgia with healing style. Inspired by classic small TVs from well-known video platformsIPImage endows the work with stronger recognition and emotional resonance.
The core innovation point is the integrated mortise and tenon buckle structure, which does not require glue, screws or other auxiliary materials. The overall splicing is tight and stable, and the corners are rounded and polished to greatly reduce the risk of collision and damage, and improve durability.
Material selection for production4mmThick natural oak board with natural texture, warm and environmentally friendly feel. The manufacturing process adopts laser cutting, with parameters set to power65WCutting speed15mm/sA single cutting can complete precise machining of all components. The assembly process is minimalist, simply aligning and clamping the two core components to complete the production process without encountering any obvious technical difficulties.
related activities
This laser cutting design participated in the activity: Revitalize Home Furnishings, Laser Creation Fun "- Home Supplies Theme Laser Creation Competition
drawing documents
piggy bank
Basic Parameters
process parameters
| Processing Technology | processed material | pattern | power(%) | speed(mm/s) | processing times |
|---|---|---|---|---|---|
| cutting | plank | Horizontal unidirectional | 65 | 15 | 1 |
Cutting process
1. Preparation in advance: will4mmThe thick oak board is flat and fixed on the workbench of the laser cutting machine. Adjust the platform level, remove dust and impurities from the surface of the board, and ensure that the cutting surface is free of warping and obstruction.
2. Parameter setting: Import the designed vector cutting drawing and set the cutting parameters to: laser power60WCutting speed15mm/sCutting frequency1Next, activate the blowing function to avoid carbonization and blackening of the wooden board during the cutting process.
3. Trial cutting calibration: performed at the corners of the wooden board1-2Perform a second trial cut to verify if the cutting depth fully penetrates the board, while checking the fit accuracy of the mortise and tenon fasteners. If there is an issue of being too tight or too loose, fine tune the drawing tolerance or cutting parameters.
4. Formal cutting: Start the equipment to start cutting, observe the entire process to ensure that the board has no displacement, no abnormal combustion or smoke. After cutting is completed, turn off the laser source first, wait for the board to cool to room temperature, and then remove the finished parts.
5. Component cleaning: Gently polish the burrs and burn marks on the cutting edge with sandpaper, clean the wood chips in the mortise and tenon groove, and prepare for subsequent splicing.
Assembly process
1. Component inventory and pre-processing: Take out all the laser cut sheet metal components, lightly grind the burrs and carbonization marks on the mortise and tenon joints and edges with fine sandpaper, and ensure that the joint surface is smooth and free of jamming; At the same time, clean the sawdust on the surface of the components to avoid impurities affecting the splicing accuracy.
2. Main body side panel splicing: Place two main body side panels with cat face patterns flat, confirm that the mortise and tenon slots are in the same direction, take out the corresponding size of top, bottom, and side panel components, align the slots, gently press them in, and form the basic frame of the piggy bank.
3. Installation of antenna components: Align the two "antenna" components with the reserved slots on the top plate, press them vertically into place, ensure that the antenna is installed firmly and does not shake, and restore the iconic shape of the old-fashioned TV.
4. Buckle reinforcement and overall adjustment: Check whether all mortise and tenon joints are fully engaged, without looseness or misalignment; Gently push the assembled overall structure and confirm that the frame is stable, without shaking or gaps; If there is a slight lag, use sandpaper to fine tune the interface and then snap it back in to complete the assembly.
5. Functional verification: Finally, check if the coin slot at the top is unobstructed, confirm that the overall structure is not loose or damaged, and that the assembly is complete.
Related Recommendations


comment (0)
-
classification
Home goods competition activity -
copyright
open source licenseCC-BY-NCProhibit commercial use; -
Business License
Further information