Laser Creation Beginner Course | Case 6: Internet celebrity road signs design project

1
2
3

Drawing Description

As a cultural and creative activity, internet famous road signs add a romantic atmosphere to the city. Its rise is partly due to the check-in trend driven by social media, and also closely related to the demand of young people for intimate interaction with the city. People share on social media I am hereXI miss you very much The street sign check-in photo contains recognition of this city! This issue brings to everyone Internet celebrity road signs The production method!

Internet celebrity road signs.jpg


drawing documents

Internet celebrity road sign decoration-Dongguan
Drawing Cover - Internet celebrity road sign decoration-Dongguan
Basic Parameters
0:4:36

Draw the appearance

(1)Open itLaserMakerSoftware, select the "Rectangle" tool from the "Drawing Toolbar" on the left, then move the mouse to the drawing area and hold down the left mouse button

Drag and drop on the drawing area to draw a length of120mmThe width is40mmDraw a rectangle with a length of ① using the same method120mmThe width is12mmThe rectangle ②, place the rectangle ②

Move to the bottom and overlap with rectangle ①, as shown in the following figure:

c1d2522b65a6166c7e570b7863570689.png

(2)Select the rectangle, choose the 'Rounded Corner' tool from the 'Drawing toolbar' on the left, and set the rounded corner radius to5mmLeft click on the right angle of the rectangle with the mouse and make it into a circle

Angle, as shown in the following figure:

1de60e5c99182f8c922f925c32aed864.png

Tips:The toolbar of tools such as "Rounded Corner" and "Merge" will only appear when the selected shape is selected.


(3)Select rectangle ① and press the keyboard first【Ctrl+c】Copy rectangle ① and then press the keyboard【Ctrl+v】Paste rectangle ① to obtain a new rectangle ③, as shown in the following figure:

c063838badf4c74926c50748bf9c88ee.png


Draw graphic elements(Text and patterns)

(1)Click on the 'Font' tool from the 'Drawing toolbar' on the left and enter 'South' Xingzhou Road68Number: North ", set the font and font size to Alibaba Universal font respectively 2.0

 SemiboldXiao Er, as shown in the following picture:

5970ac881a6412545955ca72c71e5383.png

(2)Using the same method, click on the "Font" tool from the "Drawing toolbar" on the left, enter "I miss you very much in Dongguan", and set the font and font size to Alibaba Puhui font respectively 2.0

 SemiboldThe larger one, as shown in the following figure:

60a642d1952f476c7f05d293b6eabc0f.png

(3)Select the 'equilateral triangle' shape from the 'Basic Shapes' in the upper right corner, drag it into the drawing area, and change the size of the equilateral triangle to 6 mmClick on the spiral above the equilateral triangle

Rotate the arrow, enter the numerical value, and rotate it -90°, obtain equilateral triangle ①, as shown in the following figure:

c14e7f31cb47340f4002f23abf9437e3.png

(4)Click on the equilateral triangle ① and press the keyboard first【Ctrl+c】Copy the equilateral triangle and press the keyboard【Ctrl+v】Paste the equilateral triangle and click the selection arrow above it

Head, enter a numerical value and select it180°, obtain equilateral triangle ②, as shown in the following figure:

6065d206966ec2c93acfdcecdbb6abce.png


Laser processing

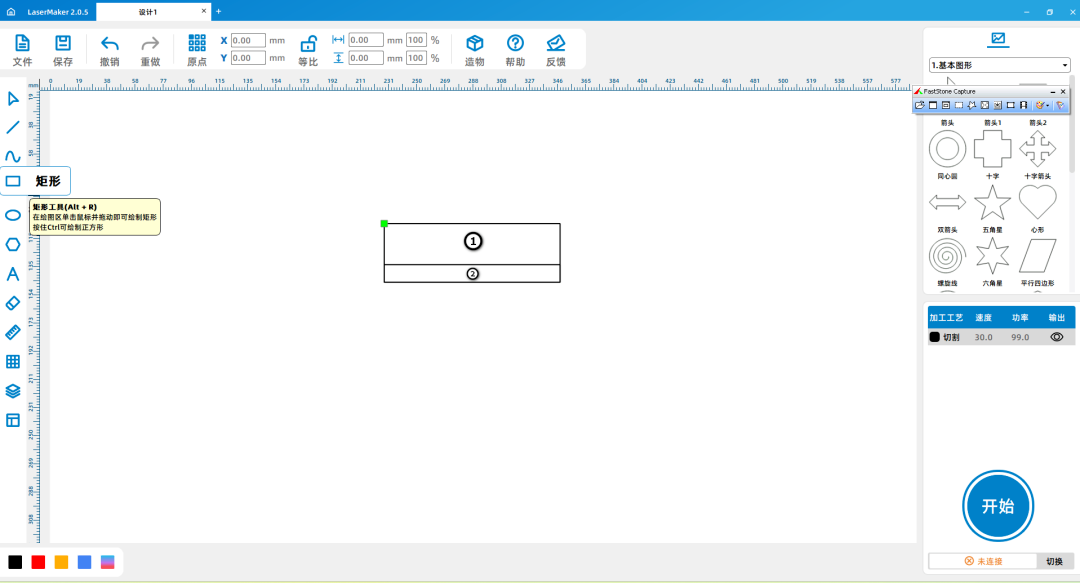
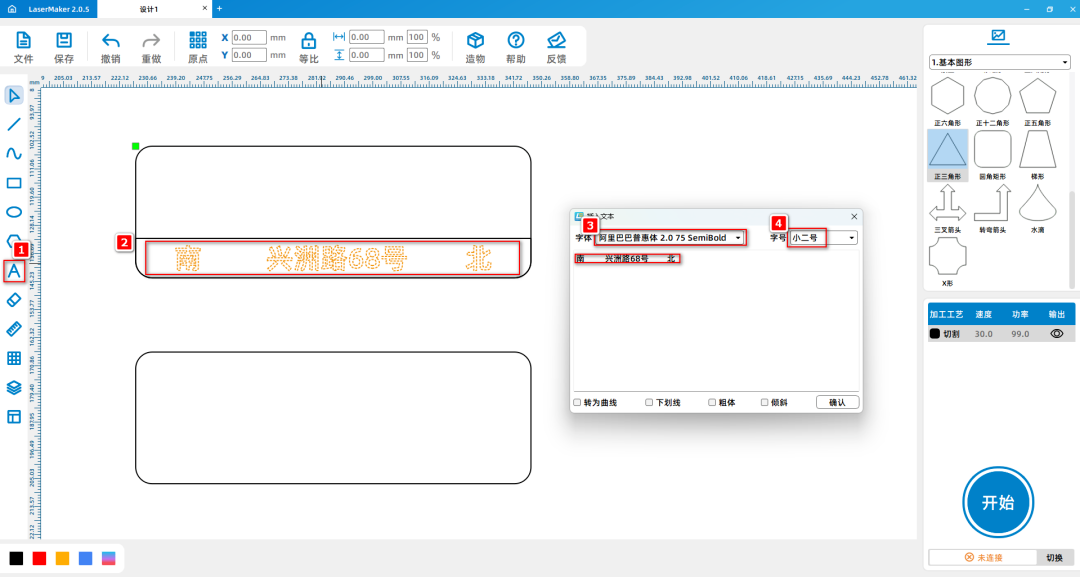
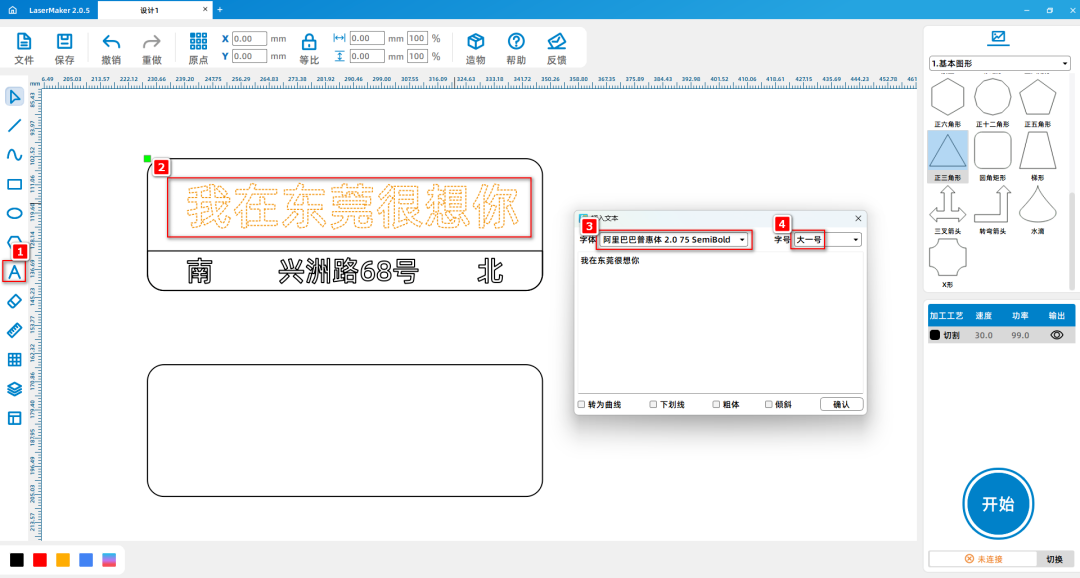
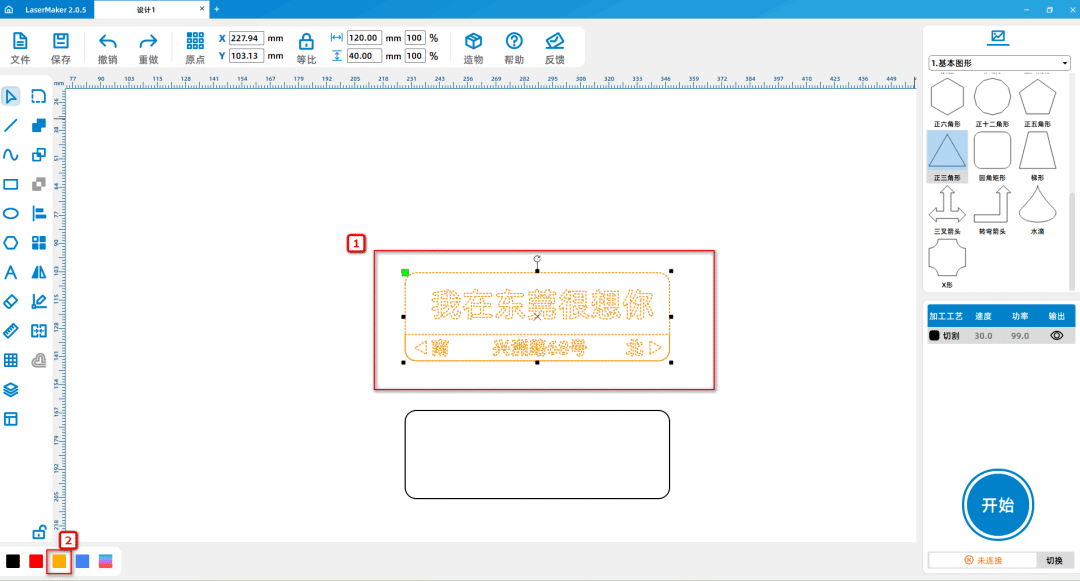
(1)Select all the contents within rectangle ①, left click on the layer panel in the lower left corner of the mouse to change the contour layer to yellow, as shown in the following figure:

6f760e78fa728c29b68f06c97176e080.png

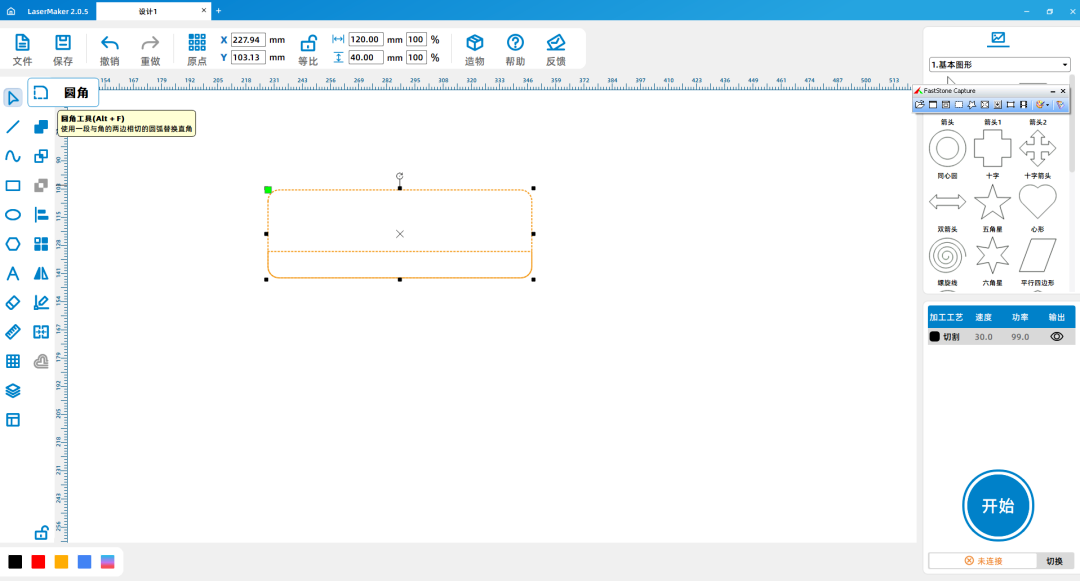
Here, 'Yin Carving' and 'Yang Carving' are used. When two layers that need to be carved overlap, the overlapping part is not carved. For example, the overlapping part of rectangle ① and rectangle ② is not carved. In this case

The carved part below is called Yin carving. The part that has not been carved is called yang carving, as shown in the following figure:

800fb5cf2eab3afa9316de17f68fc1bb.png

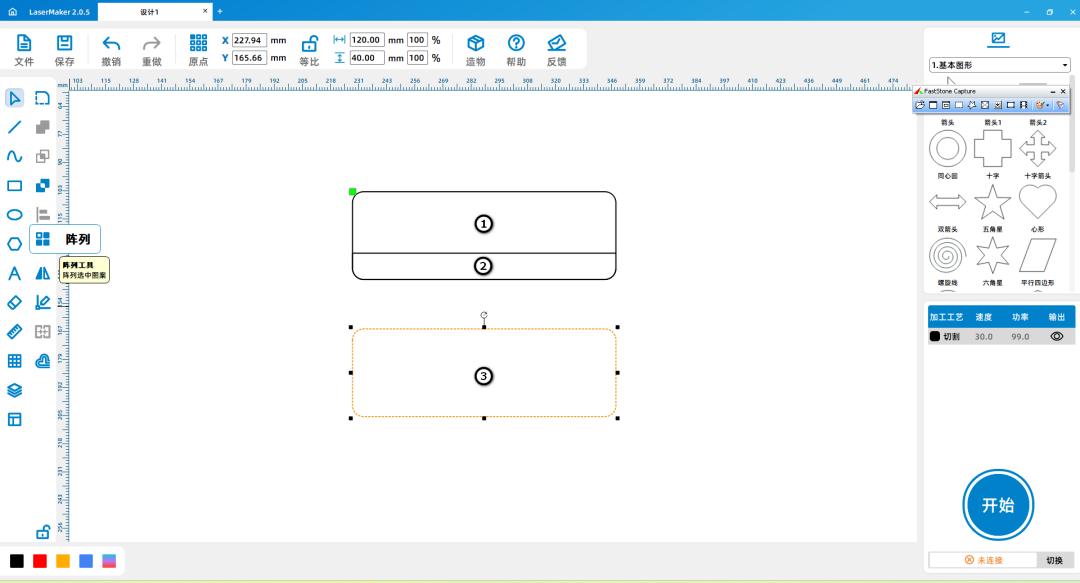
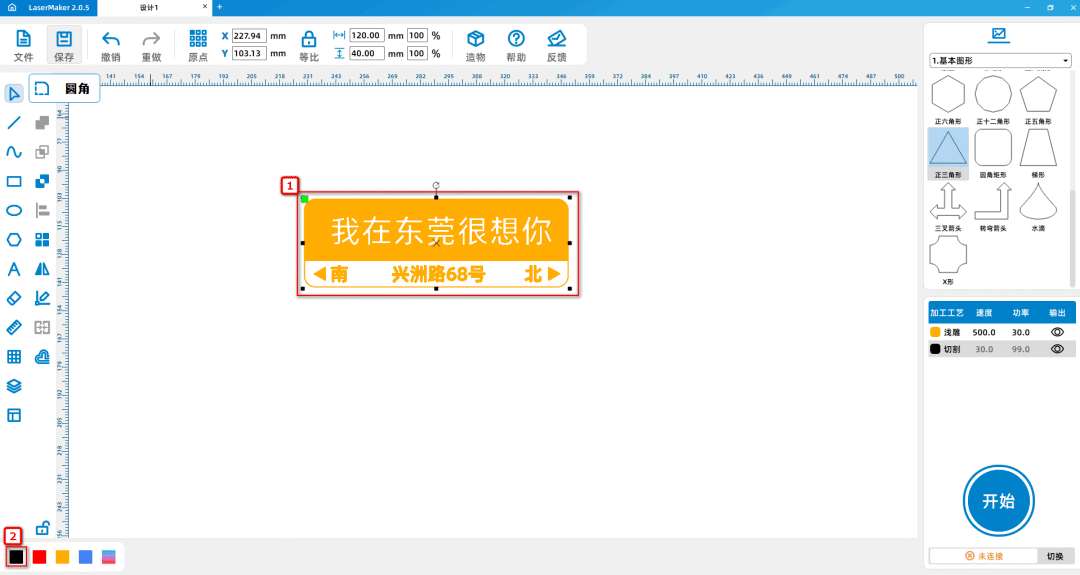
(2)Select rectangle ③ and move it to coincide with rectangle ①; Select rectangle ③, left click on the layer panel in the lower left corner of the mouse to change the contour layer to black, as shown in the following figure:

93e8c994fbd37ad1e52ac6575fa486c1.png

 (3)Double click the 'Processing Panel' in the bottom right corner with the mouseYellow layerSet the material, thickness, and process to dual color palette respectively1.5mmShallow carving; Double click on the bottom right corner of the mouse to add

The Work PanelBlack layerSet the material, thickness, and process to dual color palette respectively1.5mmCut, as shown in the following figure:

91c108f21c1b744b4a2d04b6b80a050e.png

e66d5fab20b2d6dde4ed6b0439f110c1.png

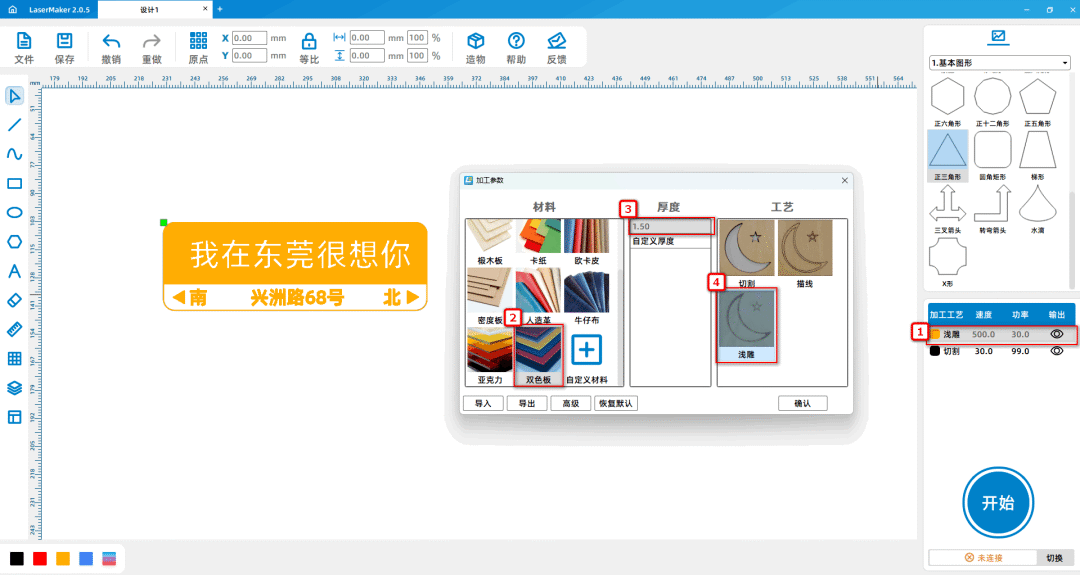
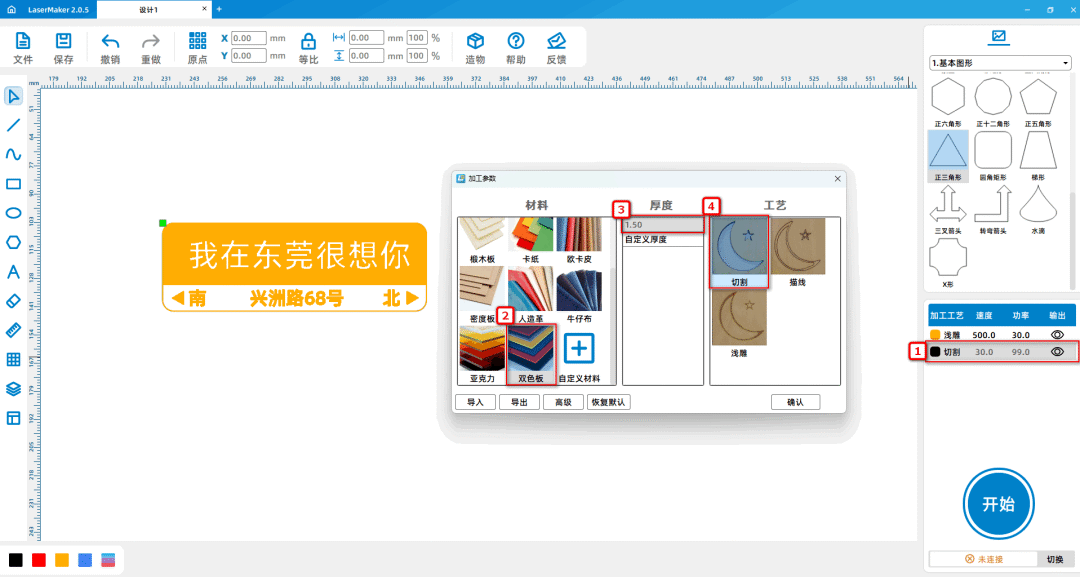
Tips:Place the yellow layer on top of the black layer, carve lightly first and then cut.
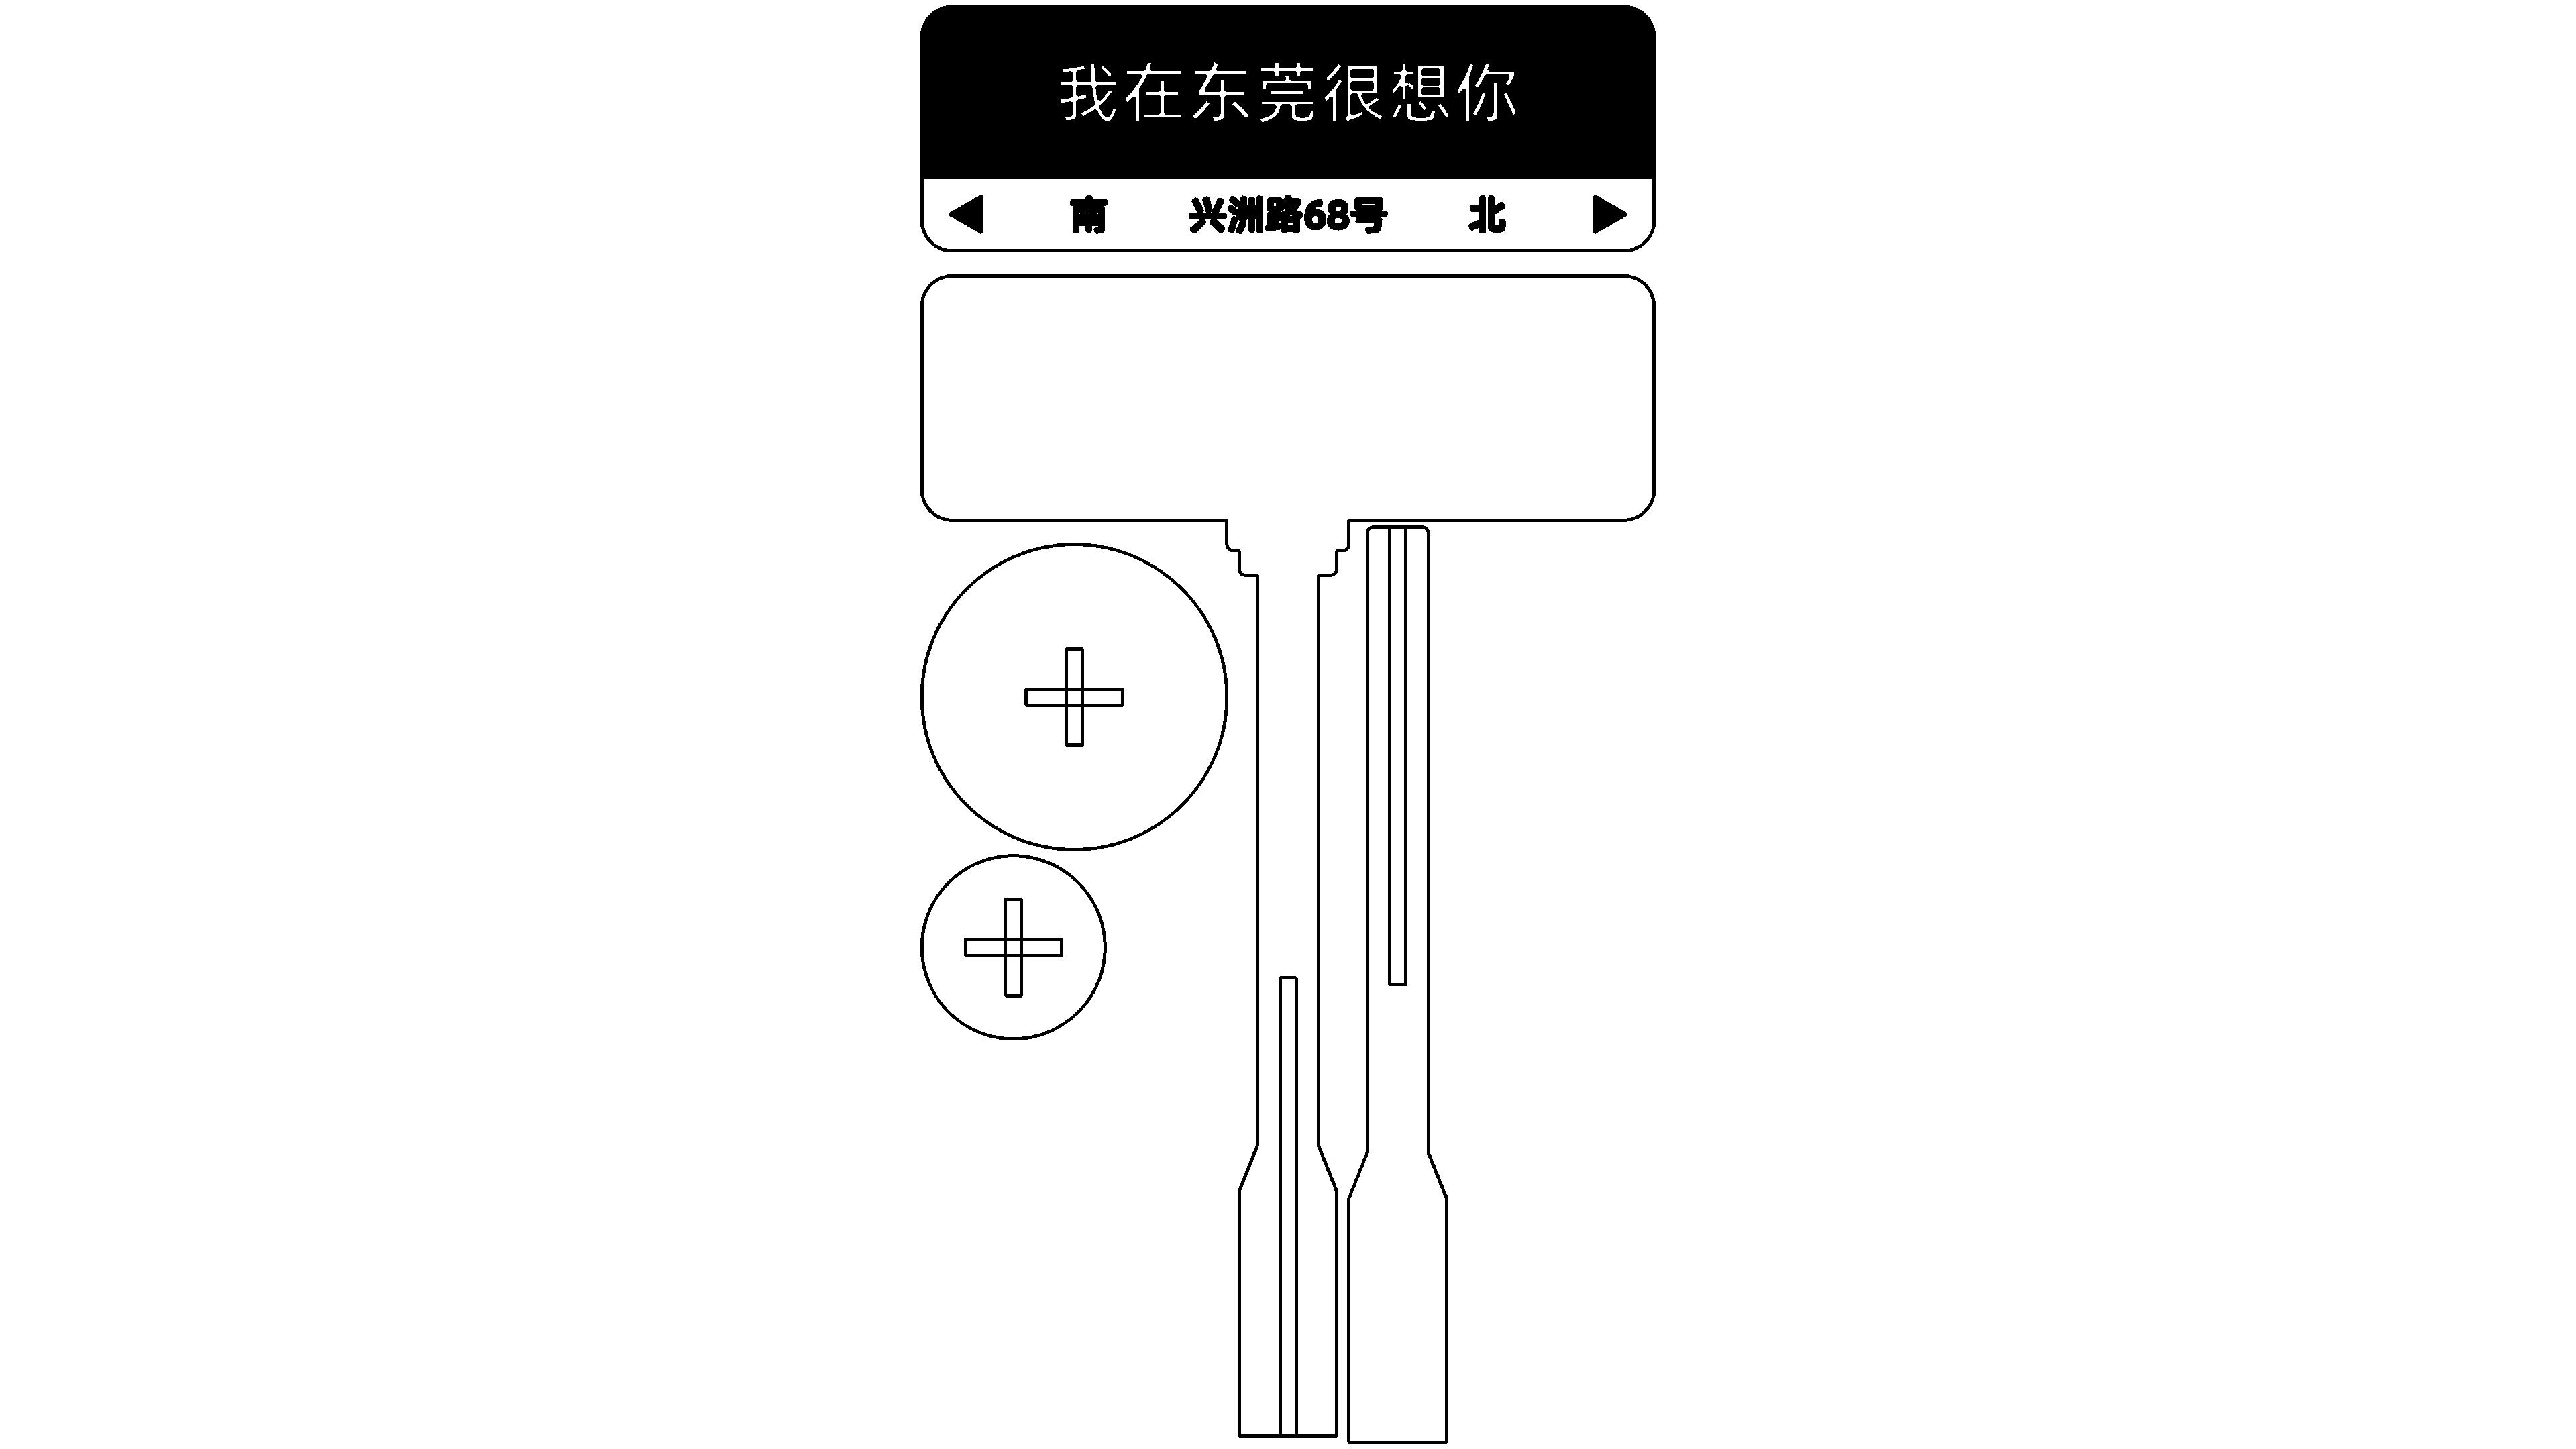
Works Display:

4687724edf9752f4713f07cf98d0dfcb.jpg

Summary:

During the process of creating this example, we learnedLaserMakerHow to use the software's' Yin Carving 'and' Yang Carving 'when there are two that need to be carved

When the layers overlap, the overlapping parts are not carved. Drawing and modeling are not difficult, everyone must try and practice more!


comment (0)
支持拖拽上传 · 最多 10 张 · 单张 ≤ 3MB
将图片拖拽到这里或点击“选择图片”上传(支持多张)
Laser Creation Beginner Course | Case 6: Internet celebrity road signs
drawing ID: SUCAI-13 2024-4-3 11:24
1
1
0
46
0Contribution points
Purchase points
collection
like
Grade discount
Basic Information
Update time 2024-4-3 11:24
advertisement