Laser Creation Beginner Course | Case 12: Felt file bag design project

1
2
3

Drawing Description

A file bag refers to a document bag or white file used for storing personal belongings or identity documents. The styles are divided into buckle style and file set style, with various materials includingPPMaterialPVCMaterial, kraft paper, OxfordBu. Today, the laser expert will lead everyone to learn how to use felt fabric to make file bags. In this issue, Laser Expert brings you the work "Felt File Bag"!

felt bag.jpg

drawing documents

felt document pouch
Drawing Cover - felt document pouch
Basic Parameters
0:6:43

File bag style design

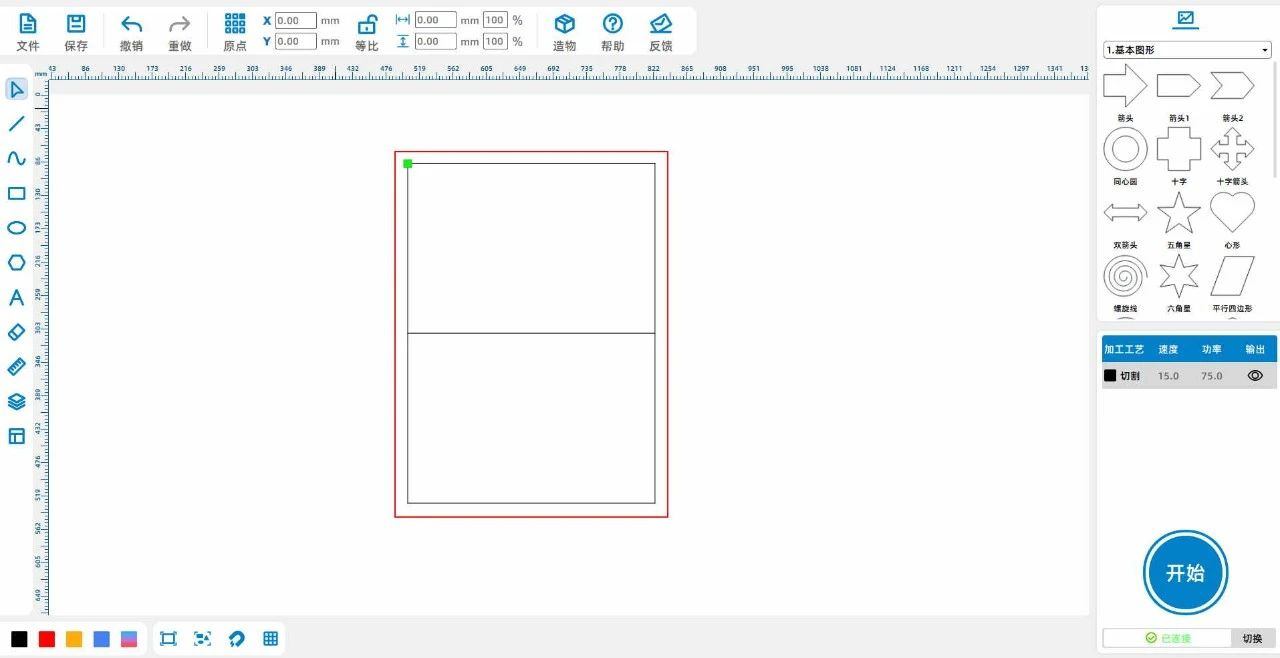
(1)Click on the 'Rectangle' tool from the 'Drawing toolbar' on the left, and drag it on the canvas to draw320×220The rectangle is shown in the following figure:

3174b4278f3d4906f973bb3e1722c7cc.jpg

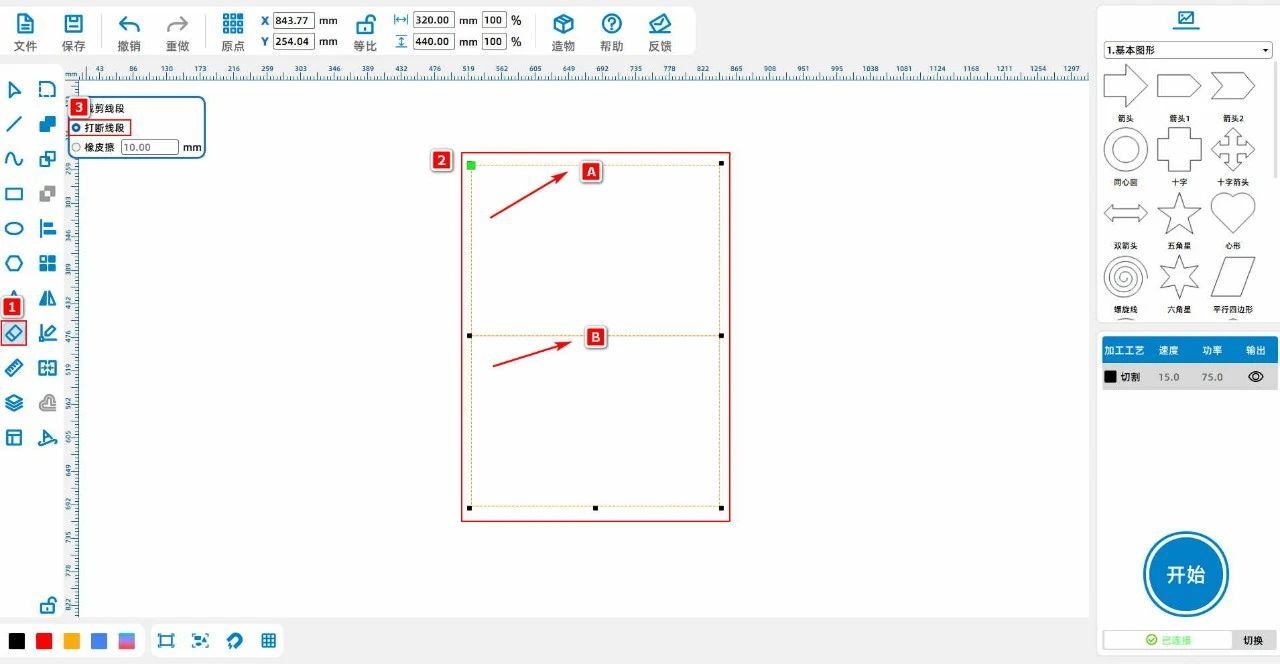
(2)Select the rectangle,ctrl+cCopy a rectangle and thenctrl+vPaste rectangles and connect the ends of two rectangles; Select the pattern, use the "Drawing Toolbar" on the left, click

Click the 'Break Line Segment' tool in the 'Eraser' toA、BBreak and delete the line segment, as shown in the following figure:

5c5b59fbc5c5995317b32dc6cad25c7d.jpg

4a3b8676258ddcde6403f56bcbbee4b9.jpg

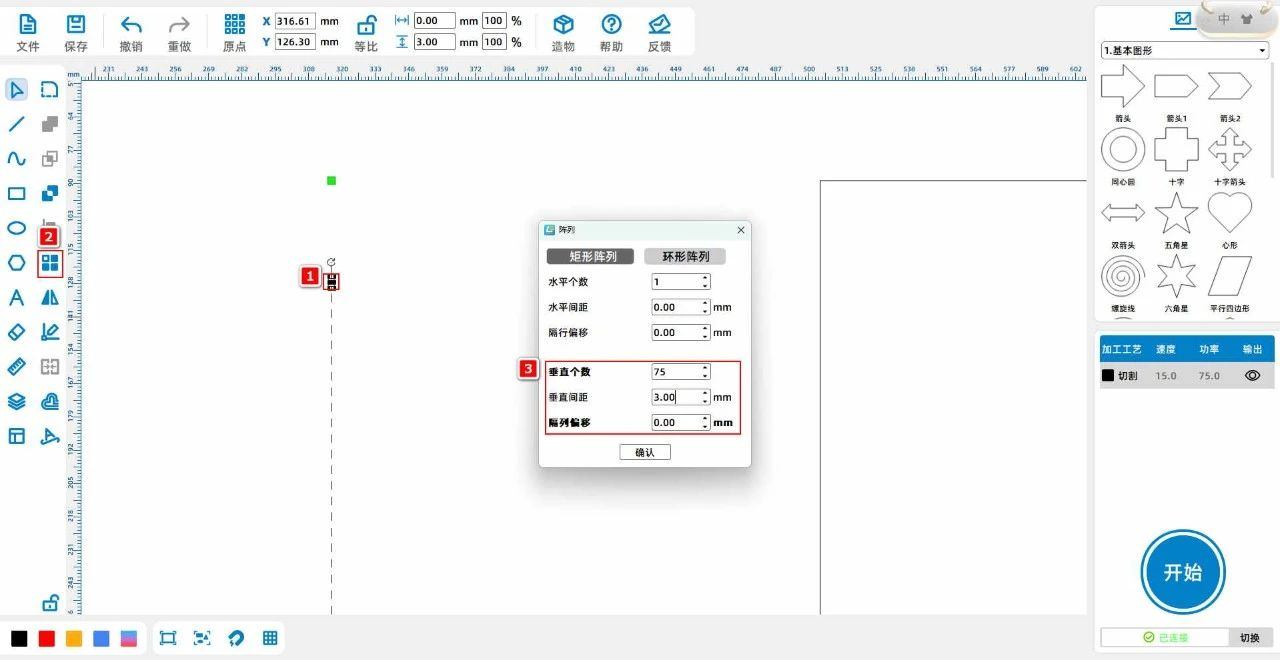
(3)Click on the tool in the "Line" section of the "Drawing Toolbar" on the left to draw3mmStraight line; Select the line, use the 'Array' tool, and set it to 'Vertical Array'

The number of vertical columns is“75”The vertical spacing is“3”Create a dashed line on the left side and move it to the left side inside the rectangle; Use the same method to create the dashed line on the right side, as shown in the following figure

As shown:

887457f0dd5ea3e253014a9a9655b3b5.jpg

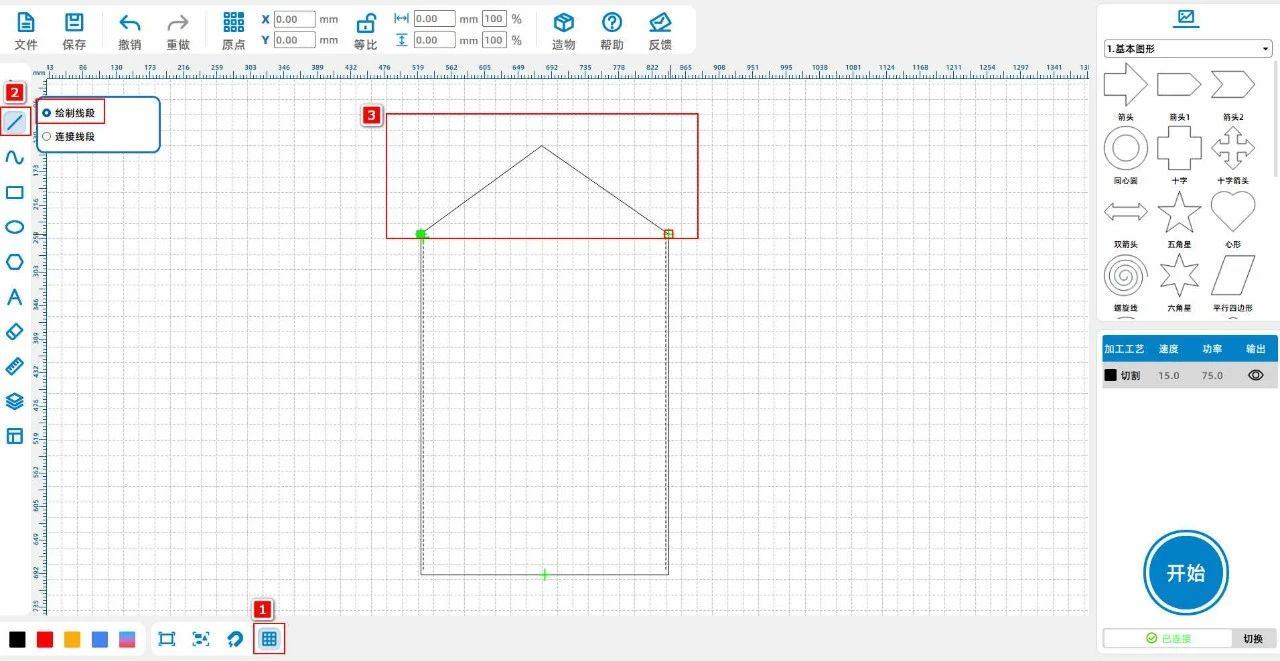
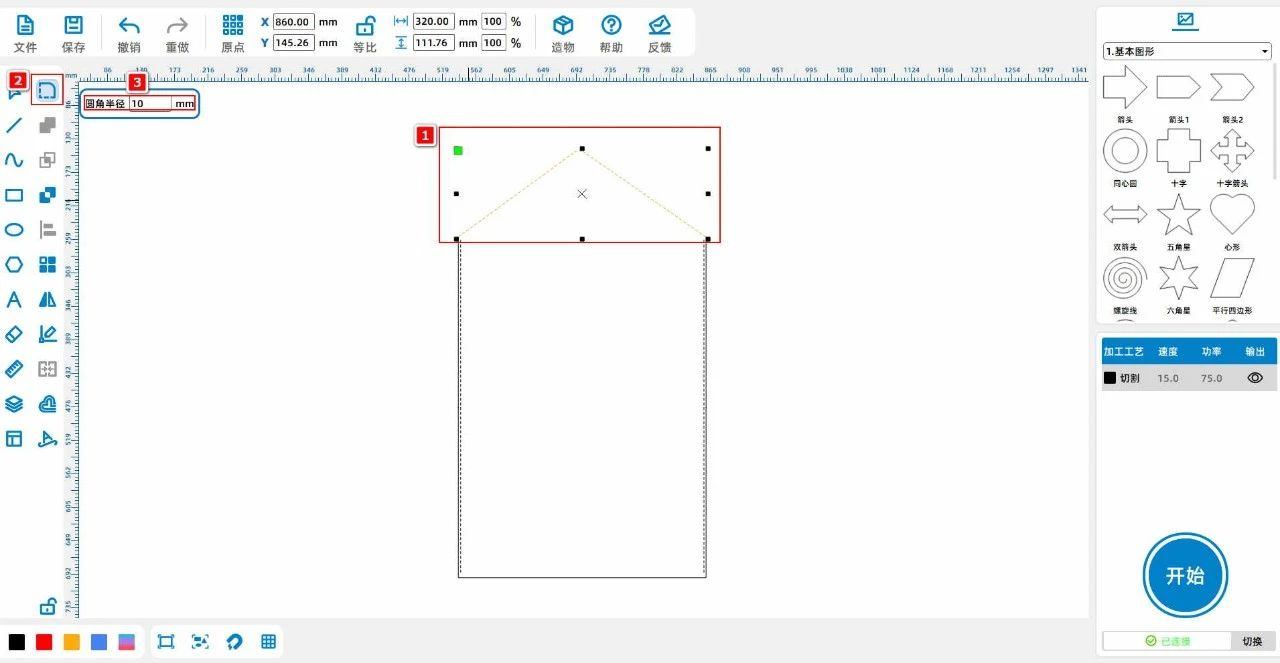
(4)Click on the 'Grid' tool below the canvas and use the 'Line Segment' tool to draw the lid of the file bag; Select the lid and use the 'Rounded Corner' tool to set the parameters to

“10mm”Guide it to a rounded corner; Use the Ellipse tool to draw a diameter of“3mm”The circle is placed directly under the lid, as shown in the following figure:

da2304ca65d334addd47d4f9ea3eac6c.jpg

309960c90f2bc1673597d15905e20caf.jpg

111054df94d1d72874b4cf87bf336804.jpg

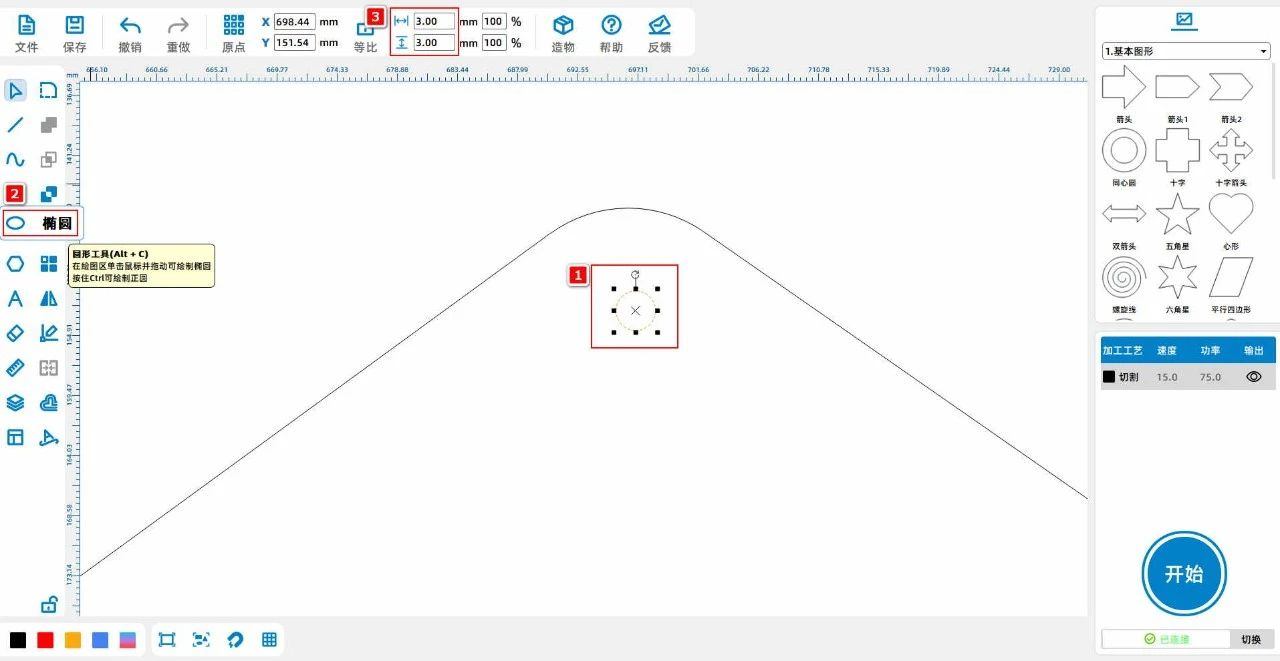
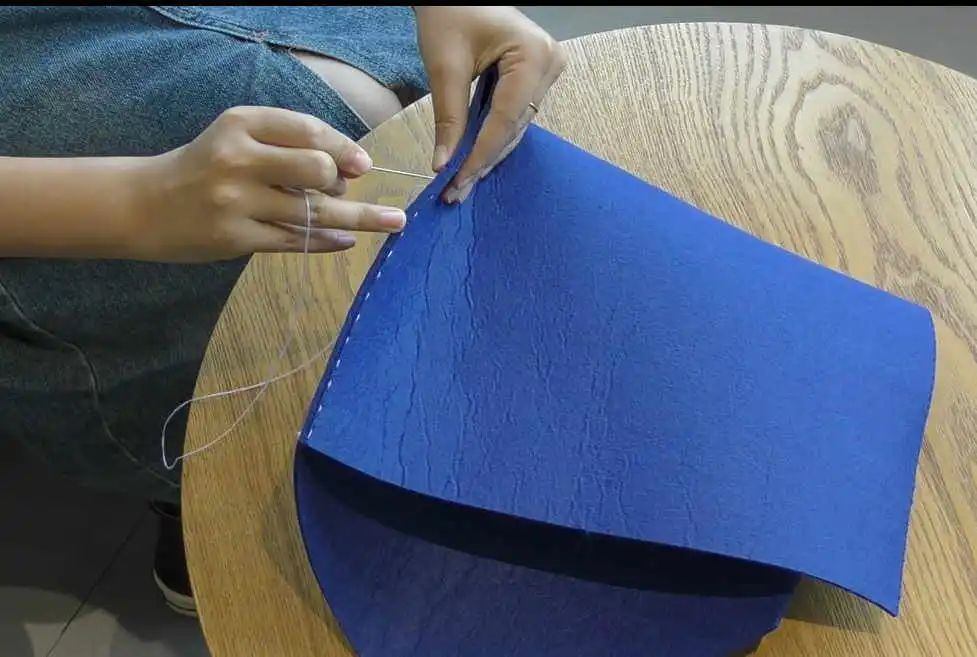
Tips:The production of a perfect circle is for binding five claw buckles.

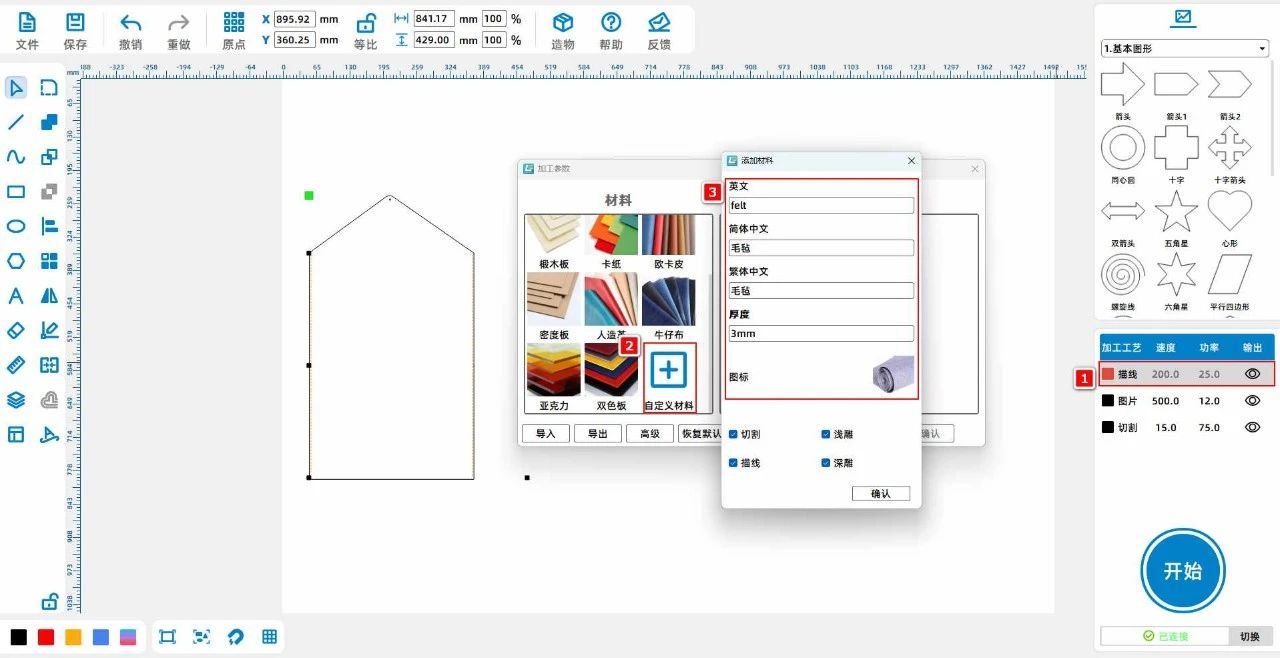
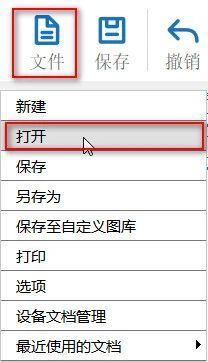
(5)Click on 'File' in the upper 'Function Area', then click on 'Open', double-click to open a favorite image, as shown in the following figure:

e2d08c0b4da6c6d51bd2fc5d330201dd.jpg120077617d1010413810e6b8cb61d139.jpg

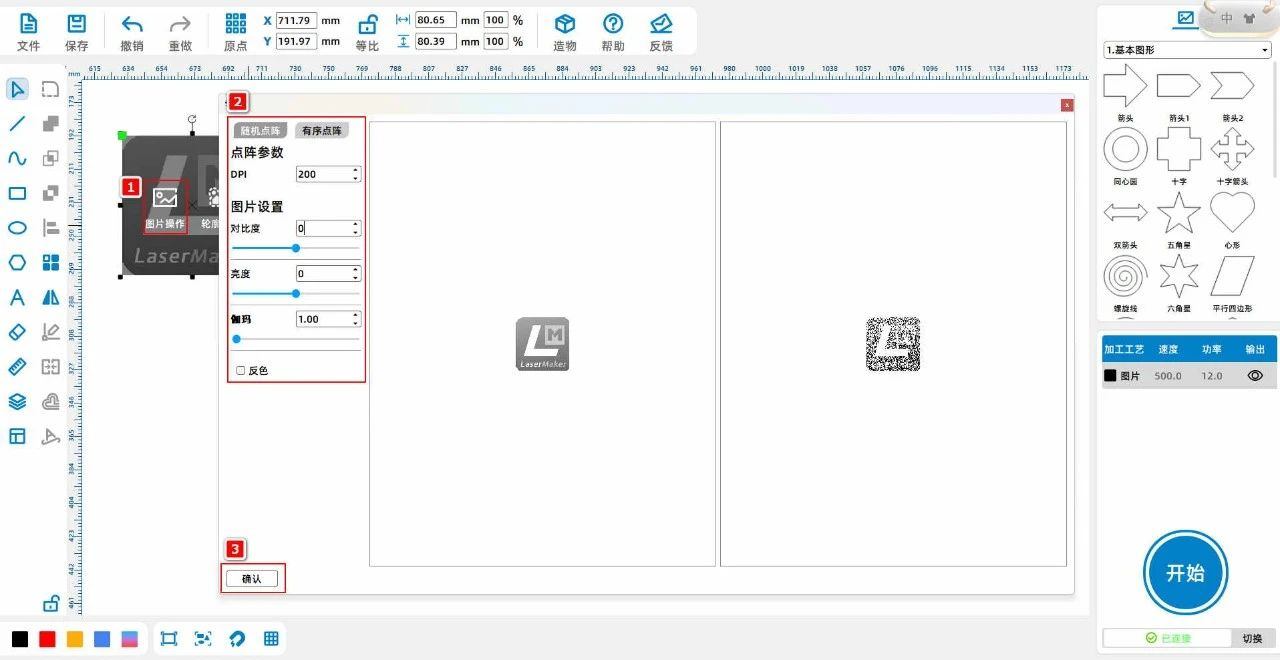
(6)Double click the image with the left mouse button, click on [Image Operation], and set the appropriate parameters, as shown in the following figure:

120077617d1010413810e6b8cb61d139.jpg

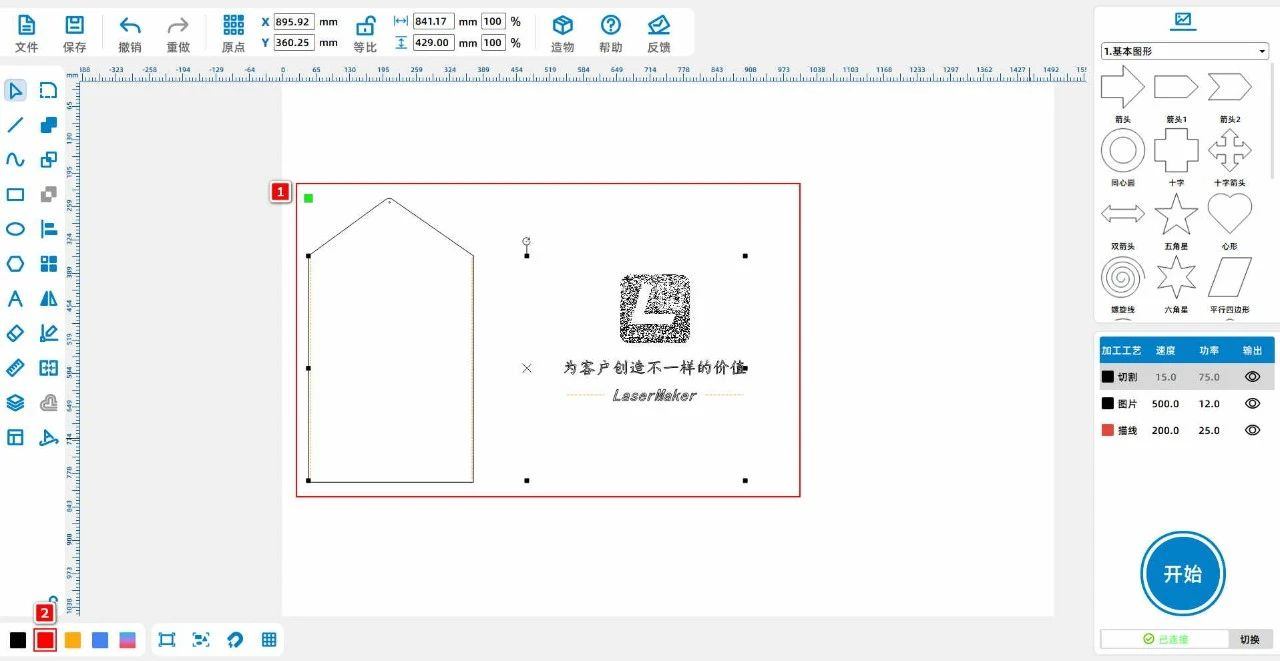
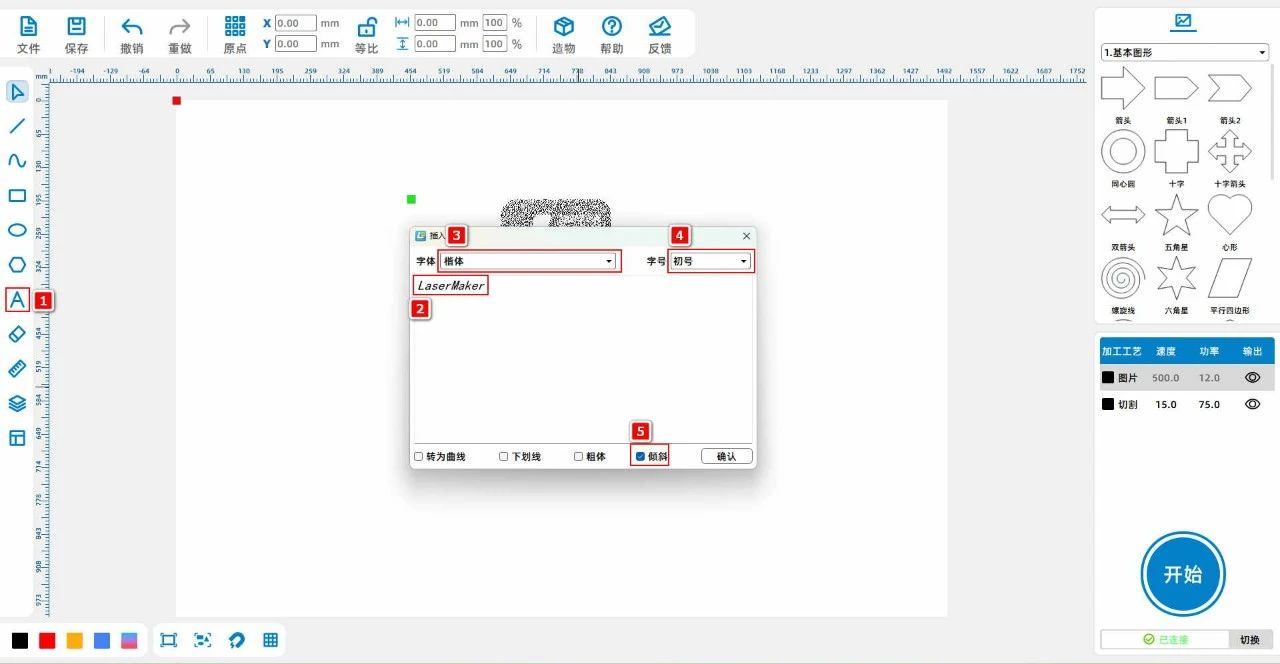
(7)Click on the "Font" tool from the "Drawing toolbar" on the left, and enter "Create Different Value for Customers" and“LaserMaker”Separate fonts and font sizes

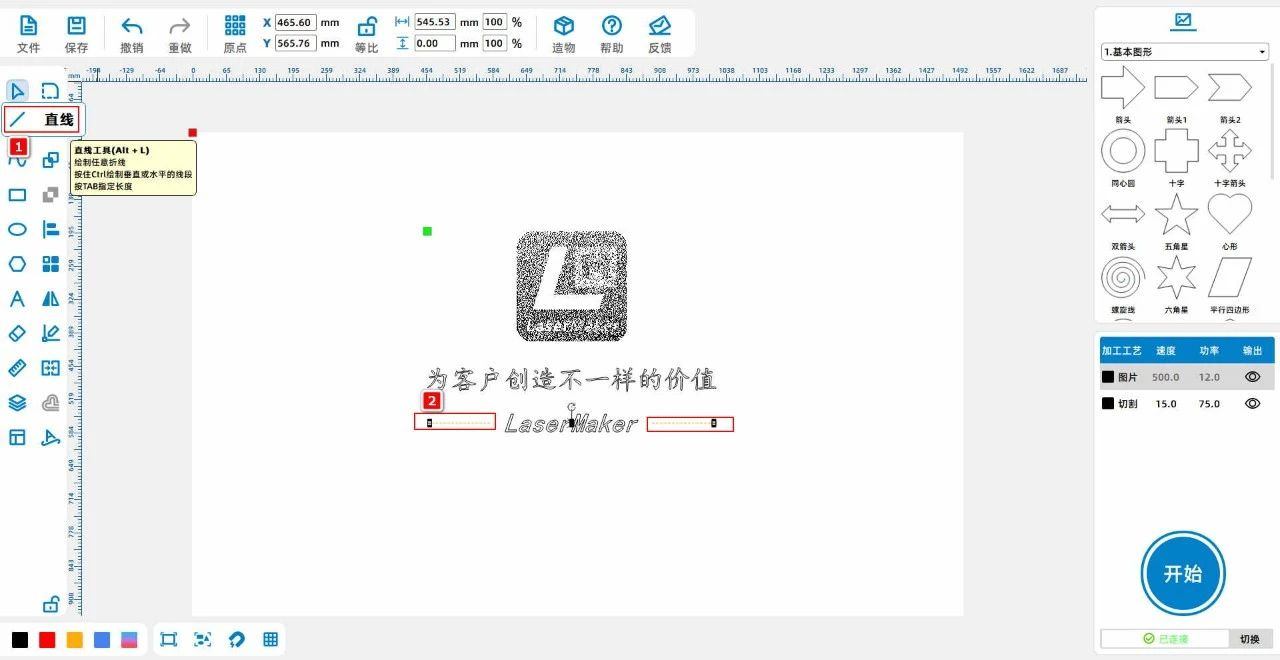
Don't set it to "Kai font" or "Chu Hao"; Will“LaserMaker”Set as' diagonal line '; Using the 'Line Segment' tool, in“LaserMaker”Draw a straight line on both sides as follows

As shown in the picture:

129faa6e71f2e4381f54a45299c281e1.jpg

9479495420bcd54106ae404d601be22a.jpg

Laser processing

(1)Select 'dashed line and two straight lines on the right', left click on the layer panel in the lower left corner to change the layer to red; Select 'Image' and font, left click on the layer panel in the bottom left corner

Change the layerFor yellow; Select 'Outline and Circle of File Bag', left click on the layer panel in the lower left corner to change the layer to black, as shown in the following figure:

c90b1701b4845f503d273b692068288e.jpg

(2)Double click the red layer on the processing panel in the bottom right corner with the mouseAdd custom material "felt", double-click "custom" with the mouse, and separate English, Simplified Chinese, and Traditional Chinese

Don't set it asfeltFelt, felt3mmDouble click the blank icon and select the felt material image; Set the material, thickness, and process to felt3mmDraw lines,

As shown in the following figure:

b4188e8b5f5fea057d438ce3e5c041c8.jpg

(3)Double click the yellow layer on the processing panel in the bottom right corner with the mouseSet the material, thickness, and process to felt3mmShallow carving; Double click on the bottom right corner with the mouse to select 'Processing'

The black layer of the panelSet the material, thickness, and process to felt3mmCutting; Adjust the positions of several layers in the order of "line drawing, light carving, and cutting",

As shown in the following figure:

9e09faa0536dde53bd2756510f7a97f1.jpg


Sewing processing

First, use needle and thread to sew the left and right sides of the file bag along the dotted line, and then use hand pliers to bind the five claw buckle to the circular position on the file bag.

9fc6bc2c71eaf91b809d9ad87ab4c478.jpg8f63a5b9b7121fe5a0e3ad0f5eb032ac.jpg

Works Display

2288a48fc7445463421152fd3866974b.jpg

summary

    In the production process of this instance, we ultimately need to sew the file bag. So in the process of designing the drawings, we need to think about how to process them in order to make the sewing more square

Is it easy? Therefore, laser experts use arrays to create dotted lines for sewing file bags, and also create regular circles for binding five claw buckles. Drawing and modeling are not difficult, large

Try and practice more at home to become a better little designer!


comment (0)
支持拖拽上传 · 最多 10 张 · 单张 ≤ 3MB
将图片拖拽到这里或点击“选择图片”上传(支持多张)
Laser Creation Beginner Course | Case 12: Felt file bag
drawing ID: SUCAI-20 2024-4-7 15:33
0
0
0
3
0Contribution points
Purchase points
collection
like
Grade discount
Basic Information
Update time 2024-4-7 15:33
advertisement